Deployment Project #91
"If-I-Can-Do-It-So-Can-You" Craft Desk
If this 14 month long deployment has taught me anything, it's that I can do it ALL as long as I am willing to step out of my comfort zone. This next deployment project is a prime example.
This girl, who has never nailed together 2 boards, BUILT A DESK all by myself!
I will admit, I can't take credit for the design. I went on a web search for "craft desk tutorial" and came across a blog that gave instructions on how to make a desk. Quickly, I found a piece of paper and copied down everything on the blog, drawing a sketch of the desk and materials needed. Thank God I did, because the next day the blog was GONE!!! No trace of it! Below is a scanned copy of my sketch, but the website you see written on it (jannypie.com) does not exist anymore.
UPDATE: ****One of my kind blog readers sent me the link on how to build this desk! Thank you!!! You can find the link HERE******
UPDATE: ****One of my kind blog readers sent me the link on how to build this desk! Thank you!!! You can find the link HERE******
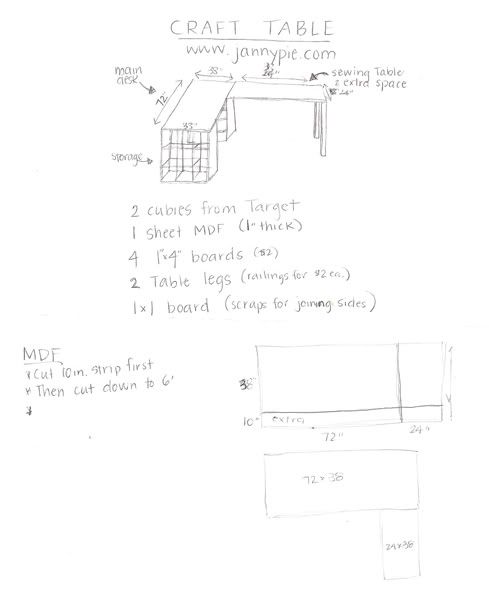
I don't have a full tutorial on this, but I can give you details if you are interested. Just send an email to Faith's Place
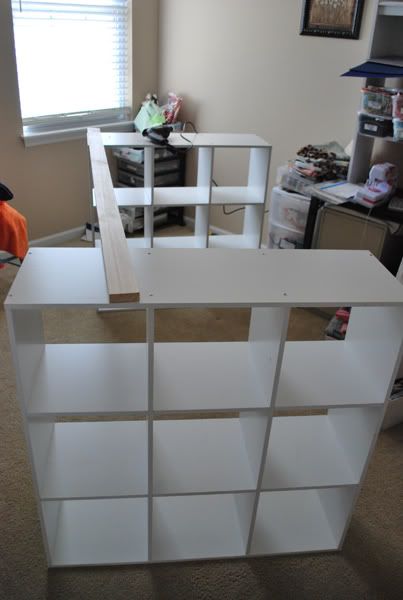
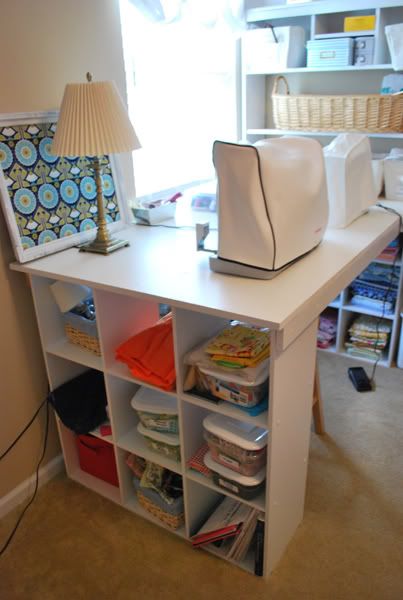
First I bought 2 cubby systems from Target.....I also bought a piece of MDF, a few boards, 2 stair spindles and some "L" brackets...(more on that later)

I attached the 2 cubbies together with two 1x6 boards, then placed the sheet of MDF on top. The boards join the cubbies together, but also act as a support beam for the MDF so that it doesn't sag in the middle. (The MDF is EXTREMELY heavy. The only assistance I needed during this project was getting the MDF on top of the desk. it must weigh 100 pounds..no joke!)

In the picture below you can see the support beams, cubbies and sheet of MDF.
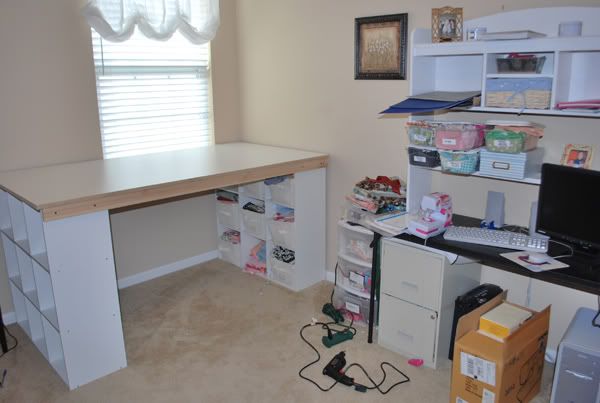
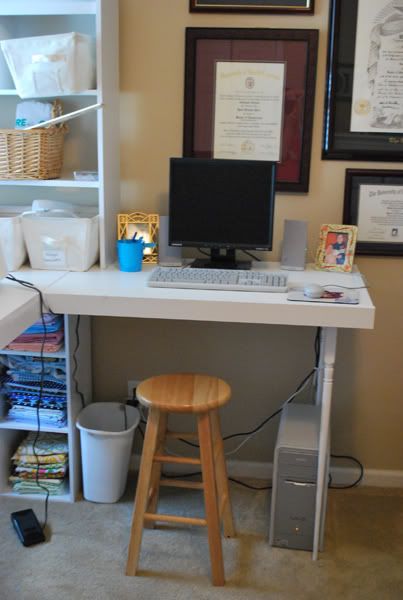
While I was at Lowe's I had the sheet of MDF cut into a few different pieces...I used the extra piece for the 2nd part of the desk, attaching it with "L" brackets.
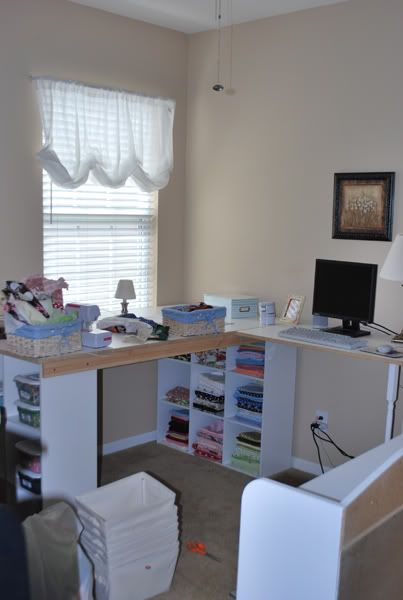
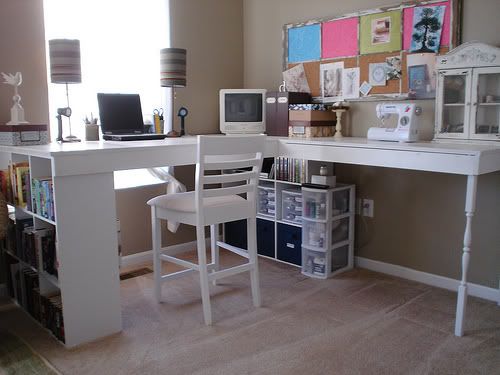
After a few hours of work, I had a desk I can be proud of....and I did it all by myself!!!! Yippee Skippy!

The white shelf you see sitting on top of the desk was something I bought at Goodwill last year for $1. You can read about it HERE

I painted teh support beams white when it was all over with.
I am still working on my craft room, (it's the last room in my house that I am re-doing) and I hope to finish it in the next week....time is running out. I have 18 days to meet my goal of 100 Deployment Projects before the hubby comes home!!!! You can read all about his deployment HERE .

Thanks so much for taking the time to check out my craft desk.
Here is a quick run-down on how I did it.
Materials Needed
2 cubbies from Target
1 sheet of 1" thick MDF ( I bought the kind that is already finished with a white top...about $30)
2 stair spindles
2- 1x6 boards (for the support between the cubbies.)
2- 1x38" boards
1 - 1x24" board
nails
"L" brackets
When you go to Lowe's and get a sheet of MDF, it comes in an 8ft by 4ft sheet. Have them cut 10" off the LENGTH of the board, then have them cut 24" off the WIDTH. This will give you a piece of MDF that is 6ft long and 38" wide, and also another piece that is 38" long and 24" wide. The smaller piece will be used for the small part of the desk. (You can discard the 10" piece)
Refer back to the first part of this to see how to do the larger part of the desk. For the smaller part, you will attach it to the larger desk using your "L" brackets. I also attached the spindles (legs). There may have been an easier way, but this was how I did it. Then I used the smaller boards to put around the desk, just for looks.
I know that is pretty brief, so just email me if you have any questions.
Deployment Project #89 will be shown again shortly with your photos you sent in to Terry Haas. She's going through them right now!! I can't wait to see what she has to say about your photos you submitted!

37 comments:
This looks great. Redoing my tiny studio space is next on my list. I like all the white.
This is amazing. Well done. So proud of you.
This is fabulous! I love your craft area! I am hoping to add onto mine in the near future!
Jenni
kissedbyafrog.blogspot.com
Awesome! Hands down an incredible project! And it looks easy enough to attempt! I love your craft/desk area!! Great job!!
Great job! I'm totally inspired!
Smiles!
Jami
Great Job. I'm very impressed! I just re-organized my work space. It feels so good to have everything in it's place.
Fabulous! I pinned this!
Jo-Anna
Great job!! ! I pinned this so whenever I get a craft space in my house I can make this! :)
Great job!! ! I pinned this so whenever I get a craft space in my house I can make this! :)
Here from TT&J weekend wrapup. WOW I need to make this on a slightly smaller scale but wow! This is awesome and I have never nailed anything together so you give me hope!!
Wow - what a great desk!! I love it. Great project!!
I featured it on my TT&J facebook page :)
xoxox
Jen
I am very impressed. I've been considering learning to some things like that but haven't taken the leap yet. :-)
thank you so much for sharing this! i don't have an extra room for a craft room until we are able to move but i desperately need a craft area. i can definitely see myself making this! it looks store bought!
I'm totally impressed! Good for you - this looks amazing! I'm a new follower of your blog via GFC
:)
Hope you're having a great weekend!
Katrina
They All Call Me Mom
I have been craving a craft desk like this in the Pottery Barn catalog for at least 4 years now. Don't know why I hadn't thought about using cubies for the ends!! Thank you!
I love this desk. I want to do the same in my son's room. I think I will use a slab door because there won't be anything too heavy on it.
Ruth
Wow, this is a really neat project and you did such a good job with details and sharing, thanks!
You did an absolutely fantastic job and should definitely be proud of yourself! It looks incredible and we are so glad you shared it with us at Inspiration Friday!
Vanessa
This is incredible! Good job! I love all the cubbies for organizing your materials!
WOW!! Great job, and I'm loving all the counter space!!
twothirtyfivedesigns.blogspot.com
great job,, looks like you have plenty of space for crafting now.
#431 and #433 on show&tell linky party.. hope you'll stop by.
wow am i jealous of your awesome desk and organization!!!!! fan-freakin-tastic!
Great job! Out of curiosity - how much did the project cost?
Ashley
A Sew Chic Boutique
This is so great! I featured it today at my Delightfully Inspiring Thursday Party. Feel free to stop by and grab a button, if you'd like.
http://delightfulorder.blogspot.com/2011/06/delightfully-inspiring-link-party-17.html
DaNita
Lofty goal of 100 projects, but just look at all you've accomplished. You should be very proud of yourself & I'm sure your hubby will be as well. This is a great desk!
How nice to have such a large craft space! Mine is slowly starting to come together in one room.
Fantastic tutorial! I’ll be building a craft table for myself soon too, so these tips are fantastic!
wooohooo! It looks great!
gail
I don't know what impresses me more--the finished desk or your sketching skills! I can't draw a box to save my life. :) It turned out so great! I love it. Thanks for sharing!
I love your craft desk. I was looking at the cubbies at Target for the same reason! Just waiting for them to go on sale, if they ever do. I never self-promote, but you'll see why when you check out my post today at texascottage.blogspot.com.
Can you tell us how well the height works for sewing? This looks awesome and looks totally like something I can do!
Holy Moly! this is great here I was all proud of myself for turning my dining cabinet into my craft storage. Hmmm, how could I work this into my space???? Thanks!!
I just discovered your blog, I love the craft desk, and as a fellow miltary wife, who is currently going threw a deployment right now, I am going to probably need to bookmark your blog & make your craft desk :) Thanks for the service & post!
Tara
Wow, you did such a nice job on this! Amazing!
I am bookmarking this wonderful DIY! My oldest son just bought his first house and his room is going to (slowly) become my craft space. He moved only a few miles away so won't be staying over much. You have created such a great space! Thanks so much for sharing at Sunday Showcase :)
This is unbelievable...I by chance caught this post through French Country, and wow, I am so hooked on your blog! Your idea of a craft area is so much like what I'm looking for! I'm going to be using your picture as inspiration (as yours is better than your original inspiration picture)! Brilliant!
Thought you might like the link to the original design.
http://www.cutoutandkeep.net/projects/diy_craft_desk
Post a Comment